【まずは英語で解説】
[Painting Phase: A Fresh Start]
Due to a server crash, I’m skipping the assembly report and restarting from the painting phase.
[Build Review: A True Nightmare]
To be honest, the quality of this kit is extremely poor.
When I first opened the box, I was shocked to find a piece of chocolate foil with German writing on it—still smeared with chocolate!
I didn't get a photo, but right then, I knew this build was going to be trouble.
The instruction manual is equally bad.
It relies on low-resolution, mixed black-and-white and color photos where the assembly arrows blend into the background, making it nearly impossible to tell where parts should go.
I had to constantly refer to Trumpeter’s instructions just to get through a basic "straight build."
The fit is also terrible.
I actually had to break the fenders off after the first attempt and use polyester putty for some heavy-duty sanding and refitting just to make them look decent.
As for the OVM (On-Vehicle Equipment), they appear to be copies of Dragon parts. The fenders also seem to be molded from the Tamiya Flak 36/37. It doesn’t feel like an original kit at all.
The gun mantlet, which should normally be photo-etched, is made of resin. Because it’s cast so thin, warping and air bubbles are very noticeable. The official build sample shows it in the folded position—this is the only kit that offers that option, which is a nice touch.
However, I wanted to depict it in combat mode, so I struggled to model it in the open position.
It’s still a bit warped, but let’s just call it "battle damage."
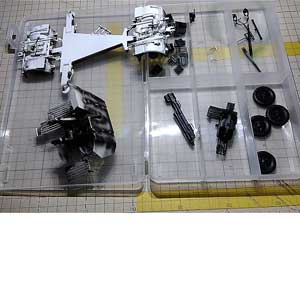
The kit seems to be from an early 90s hand-poured mold.
Cleaning up gates and flash was an absolute nightmare, and the solid-cast parts are riddled with air bubbles.
While there is some photo-etch included—specifically for the gunner's auxiliary shield and the spent shell casing cover—it feels half-hearted.
I decided to detail it myself: I scratch-built the OVM clamps using copper wire, replaced the mantlet supports and stereo rangefinder mounts with brass, and added the safety guard (recoil guard) at the rear of the recoil mechanism.
The only redeeming feature is the brass main gun barrel.
If the entire kit matched this quality, it might be worth the price.
Regardless, I will never buy another kit from this manufacturer again, even if they're on sale—unless it's just for the option parts.
[Painting Phase]
Since this is a full resin kit, I started with an automotive primer for the base coat.
The photos show the initial shading; I plan to add a bit more shadow to the upper hull before moving on.
I’ll be using Dark Yellow as the base color.
----------------------------
サーバークラッシュのため、製作編を省いて塗装編から仕切り直しです。
(製作所感)
そもそもこのキットは、極めて低品質です。
箱を開けてビックリ!
なんと、ドイツ語で書かれたチョコレートの銀紙が入ってました。
しかもチョコレートがベットリ・・
写真の記録を撮ってなかったのですが、この時点でダメなオーラ全開です・・
インストもそのうち紹介できればと思いますが、極めて解像度の低い白黒カラー混在の写真を多用し、取付を指示する矢印が写真に溶け込んで、どこに取り付ければ良いのか極めて分かりづらいです。
そのため、トランペッター製のキットの取説を参照しながらでないと、ストレート組みでも困難を極めます。
また、パーツの合いも極めて悪いです。
フェンダーとか取付けた後に一旦破壊し、ポリパテでハードなすり合わせをおこない、やっとそれっぽく仕上げることが出来ました。
OVMですが、ドラゴン製のパーツのコピーです。
フェンダーはタミヤ製FLAK36/37のコピーのようにも思えますが、いずれにせよオリジナルではなさそうです・・
砲の防楯ですが、通常エッチングで再現すべきところ、レジン製です・・
そして薄く作られているので、歪みや気泡が目立ち、完成見本は折り畳んだ状態を再現しています。
折り畳んだ状態を再現できるのはこのキットだけなので、開閉の選択をできるのは良いのですが、戦闘状態を再現したかったので、何とか開いた状態で作ってみました。
多少歪みが目立ちますが、戦闘によるダメージということにします。
キットは全体的に90年代初頭の手流しで型取りしているものと思われます。
ゲートやバリの処理も困難を極め、無垢成形パーツはホントに気泡が目立ちます。
エッチングは全く使われていない訳ではないですが、射手の補助防楯と排莢部カバーがエッチング製で、中途半端感が拭えません。
その他、OVMクランプを銅線でディテールアップし、防楯支柱とステレオレンジファインダー受けを真鍮で作り替え、駐退復座機後部の防危板(?)を付け加えました。
唯一褒められるのは真鍮製の主砲です。
このクオリティでキット全体を構成してくれたら、金額に見合ったキットと評価できるのですが・・
いずれにしても、今後このメーカーのキットが安く販売されていたとしても、オプションパーツ以外は購入することはありません。
(塗装編)
キットは、フルレジン製のキットなので、自動車用のプライマーを使用して下地を作りました。
写真は影を付けた様子ですが、車台上部にもう少し影付けして塗装に臨む予定です。
ちなみに、ベースカラーはダークイエローとする予定です。
\ 最新情報をチェック /